Hi there everyone. Another month has whooshed by and so once again it is time for the Rudolph Days Challenge over at Scraps of Life by Scrappymo, run by lovely Mo, and believe it or not there are now only two more challenges before Christmas, so time to motor on with those seasonal cards. The challenge runs from the 25th to the end of each month, and as it is the last day of the month today I have made this very quick card using an upcycled topper. Our son has been visiting from Australia and we had a great time in Cornwall this last week with beautiful weather, warm sun every day, definitely good for the time of year. Sadly we have now said goodbye as he has gone to visit friends prior to returning to Sydney tomorrow, and thank goodness for Skype, how did we manage before.
I used a couple of foliage stamps and a sentiment from a Chocolate Baroque set called Robin the Spruce and made this wreath of foliage around the topper using two of the stamps, and also added a sentiment from the set. I put the 6" square white card into my Misti and laid the pinecone foliage stamp across the corner and stamped using Versamark ink, and by twisting the card a quarter turn each time placed the corners. Then I used the smaller berries stamp and put that in between and did the same thing to get that circular shape. I finished by heat embossing with the WOW Metallic Gold Embossing Powder.
To finish I then placed the sentiment and again embossed with the Gold EP. I do think my sentiment could have been a little straighter though. I decided to give the topper more dimension by adding a piece of white foam behind to raise it up a bit.
Thank you for visiting here today and I will be back again tomorrow.
I am also entering the following challenges:
Crafty Hazelnuts Christmas Challenge - No. 405 Anything Goes.
Addicted to Stamps Challenge - No. 166 Christmas Comes Early.
Simon Says Wednesday Challenge - Anything Goes.
Sunday, 30 September 2018
Monday, 24 September 2018
Steampunk Airship/Balloon
Hi everybody. I needed a masculine birthday card and I thought I would use this fabulous airship cum balloon which comes in a set of steampunk stamps by Chocolate Baroque called Steampunkery. These stamps are steampunk with a twist, a little quirky but very useful for male cards, though I think they can be appreciated by all and they are very detailed and fun too.
I started with a piece of white card about 5.75" square on which I stamped the image using Versafine Vintage Sepia ink and then I heat embossed using WOW Clear Gloss Embossing Powder. I then stamped the image on to a piece of copy paper and fussy cut it out to use as a mask.
I then ink blended using a Visible Image stencil called Strobes, using a stencil brush and a couple of colours of Distress Ink - Fossilised Amber and Spiced Marmalade. Keeping the stencil in place I added some clouds with a mask I drew and cut out myself, again using the stencil brush, and Broken China and Mermaid Lagoon DI. Using the brush means you can add the colour very carefully and build it up to whatever strength you want, and I didn't want the colours to be too strong. I think the colours do look more green than blue due to the yellow already added. I removed the stencil and took the white off the Strobes and the clouds by adding more yellow and orange to them. I then removed the mask and coloured the airship using a waterbrush and some Walnut Stain and a little Broken China mixed in to keep the colours in harmony with one another.
I finished by stamping a sentiment, again using the Versafine Vintage Sepia, and then added WOW Clear Gloss EP over the top before adhering it to a 6" square white base card.
Thank you for joining me today and I'll see you again soon.
I am entering the following challenges:
Stamping Sensations September Challenge - I Spy something beginning with 'B' (Balloon, Blue sky, Birthday card).
Allsorts Challenge - Week 486 Water or the Colour Blue. (My sky is a blue colour so hope this link to the theme is sufficient).
Watercooler Wednesday Challenge - Anything Goes. (I was thrilled to be chosen as the weekly winner of this challenge).
I started with a piece of white card about 5.75" square on which I stamped the image using Versafine Vintage Sepia ink and then I heat embossed using WOW Clear Gloss Embossing Powder. I then stamped the image on to a piece of copy paper and fussy cut it out to use as a mask.
I then ink blended using a Visible Image stencil called Strobes, using a stencil brush and a couple of colours of Distress Ink - Fossilised Amber and Spiced Marmalade. Keeping the stencil in place I added some clouds with a mask I drew and cut out myself, again using the stencil brush, and Broken China and Mermaid Lagoon DI. Using the brush means you can add the colour very carefully and build it up to whatever strength you want, and I didn't want the colours to be too strong. I think the colours do look more green than blue due to the yellow already added. I removed the stencil and took the white off the Strobes and the clouds by adding more yellow and orange to them. I then removed the mask and coloured the airship using a waterbrush and some Walnut Stain and a little Broken China mixed in to keep the colours in harmony with one another.
I finished by stamping a sentiment, again using the Versafine Vintage Sepia, and then added WOW Clear Gloss EP over the top before adhering it to a 6" square white base card.
Thank you for joining me today and I'll see you again soon.
I am entering the following challenges:
Stamping Sensations September Challenge - I Spy something beginning with 'B' (Balloon, Blue sky, Birthday card).
Allsorts Challenge - Week 486 Water or the Colour Blue. (My sky is a blue colour so hope this link to the theme is sufficient).
Watercooler Wednesday Challenge - Anything Goes. (I was thrilled to be chosen as the weekly winner of this challenge).
Saturday, 15 September 2018
Quick Cards for September
Hi everyone. Here are a couple of quick cards I made for a post which Chocolate Baroque do once a month over on their Design Team Blog featuring cards which take about 15 minutes to make.
I started this using two different images from the Nature's Paisley set of stamps using Ground Espresso Distress Ink and heat embossing with Versamark Ink and WOW Clear Gloss Embossing Powder. I then blended ink into the background using Twisted Citron, Lucky Clover, Carved Pumpkin and Blueprint Sketch Distress Inks. I added a bit of script from the Paisley Elephant set using Blueprint Sketch DI ink, and then added a little stamp from the Indian Textiles set and heat embossed with WOW Silver Metallic EP. I also defined the edge a bit more with the Blueprint Sketch.
I finished it with a piece of turquoise vellum stamped and heat embossed with the sentiment which wraps around the background before adhering to the white base card.
For this second card I used a flower image from the Indian Textiles set, and stamped the flowers using Ground Espresso Distress Ink and coloured using Abandoned Coral DI and Fossilised Amber for the flowers, and some more Fossilised Amber and Twisted Citron for the foliage, applied with a waterbrush I then filled in the background using Salty Ocean and some more twisted citron together with a bit of Blueprint Sketch around the edges, again using a waterbrush. The water had made the lines of the stamped flowers a bit indistinct so I defined them with a very fine Black Micron Pen.
I die cut it with a Crealies Pierced Rectangle and added a white layer behind it. I then added one of the stamps from Nature's Paisleys set to each of the corners of the white base card using Versamark and WOW Gold Metallic Embossing Powder before mounting the flowers on to it.
Thank you for looking at my blog today and if you want to see lots of great inspiration then head on over to the Chocolate Baroque DT Blog.
I started this using two different images from the Nature's Paisley set of stamps using Ground Espresso Distress Ink and heat embossing with Versamark Ink and WOW Clear Gloss Embossing Powder. I then blended ink into the background using Twisted Citron, Lucky Clover, Carved Pumpkin and Blueprint Sketch Distress Inks. I added a bit of script from the Paisley Elephant set using Blueprint Sketch DI ink, and then added a little stamp from the Indian Textiles set and heat embossed with WOW Silver Metallic EP. I also defined the edge a bit more with the Blueprint Sketch.
I finished it with a piece of turquoise vellum stamped and heat embossed with the sentiment which wraps around the background before adhering to the white base card.
For this second card I used a flower image from the Indian Textiles set, and stamped the flowers using Ground Espresso Distress Ink and coloured using Abandoned Coral DI and Fossilised Amber for the flowers, and some more Fossilised Amber and Twisted Citron for the foliage, applied with a waterbrush I then filled in the background using Salty Ocean and some more twisted citron together with a bit of Blueprint Sketch around the edges, again using a waterbrush. The water had made the lines of the stamped flowers a bit indistinct so I defined them with a very fine Black Micron Pen.
I die cut it with a Crealies Pierced Rectangle and added a white layer behind it. I then added one of the stamps from Nature's Paisleys set to each of the corners of the white base card using Versamark and WOW Gold Metallic Embossing Powder before mounting the flowers on to it.
Thank you for looking at my blog today and if you want to see lots of great inspiration then head on over to the Chocolate Baroque DT Blog.
Sunday, 9 September 2018
Ammonite Birthday
Hi everyone. I needed a masculine birthday card and decided to use a Chocolate Baroque Ammonite stamp. I live only about an hour from the Jurassic Coast and in Lyme Regis the shops are full of fossils and even their street lamps have an ammonite design incorporated into them, and I do love the shape of it. Here is what I did.
I decided to try a new to me technique using Brushos directly on to the stamp and spritzed with water before stamping, and it worked fairly well. I used Brown, Turquoise and Orange sprinkled randomly over the stamp, and I stamped it down on to a piece of lightweight card. I used the same colours with the addition of a bit of black Brusho to paint over it and add a few more lines and additional colour. I then fussy cut it out once it was dry.
In the meantime there was so much ink left on the stamp that I spritzed it again and stamped it again on to another piece of white card with the whole image in the middle and then partial images round the edges. I managed all five times without adding any more Brushos but obviously it gradually faded but I thought the four around the edges didn't need to be bright. I then added some Distress Inks with a blending tool, using Mermaid Lagoon and Ground Espresso, and then I decided to make the outlines more defined so stamped with Hickory Smoke, just lining it up by eye as I didn't use my Misti, and as it is a fairly simple shape it was fine. I decided to keep the colours quite light as I didn't want it to be too dark and heavy.
To be honest I wasn't sure whether to use the background with just a sentiment and use the cut out image on another card, but finally decided to add it over the whole image in the centre using Pinflair Glue Gel to give it a bit of dimension.
When dry I attached it to a 6" square white base card and added the sentiment beneath using Versafine Smokey Gray heat embossed with WOW Clear Gloss Embossing Powder.
Thank you for coming to take a look a my blog today and I'll see you again soon.
I am entering the following challenges:
Stamping Sensations September Challenge - Something Beginning with 'B' (I have used Brushos).
Simon Says Wednesday Challenge - Stamp on It for Stamptember.
Simon Says Monday Challenge - Stamp It On. (So pleased to be one of the four to be chosen for the Designer Spotlight)
Happy Little Stampers September Watercolour Challenge - Anything Goes (no optional twist).
I decided to try a new to me technique using Brushos directly on to the stamp and spritzed with water before stamping, and it worked fairly well. I used Brown, Turquoise and Orange sprinkled randomly over the stamp, and I stamped it down on to a piece of lightweight card. I used the same colours with the addition of a bit of black Brusho to paint over it and add a few more lines and additional colour. I then fussy cut it out once it was dry.
In the meantime there was so much ink left on the stamp that I spritzed it again and stamped it again on to another piece of white card with the whole image in the middle and then partial images round the edges. I managed all five times without adding any more Brushos but obviously it gradually faded but I thought the four around the edges didn't need to be bright. I then added some Distress Inks with a blending tool, using Mermaid Lagoon and Ground Espresso, and then I decided to make the outlines more defined so stamped with Hickory Smoke, just lining it up by eye as I didn't use my Misti, and as it is a fairly simple shape it was fine. I decided to keep the colours quite light as I didn't want it to be too dark and heavy.
To be honest I wasn't sure whether to use the background with just a sentiment and use the cut out image on another card, but finally decided to add it over the whole image in the centre using Pinflair Glue Gel to give it a bit of dimension.
When dry I attached it to a 6" square white base card and added the sentiment beneath using Versafine Smokey Gray heat embossed with WOW Clear Gloss Embossing Powder.
Thank you for coming to take a look a my blog today and I'll see you again soon.
I am entering the following challenges:
Stamping Sensations September Challenge - Something Beginning with 'B' (I have used Brushos).
Simon Says Wednesday Challenge - Stamp on It for Stamptember.
Simon Says Monday Challenge - Stamp It On. (So pleased to be one of the four to be chosen for the Designer Spotlight)
Happy Little Stampers September Watercolour Challenge - Anything Goes (no optional twist).
Wednesday, 5 September 2018
Ruby Wedding Card
Hi everyone. My cousin and her husband are celebrating their Ruby Anniversary, and 40 years is not to be sneezed at, so I thought I had better pull out as many stops as possible and try to make a really elegant card....well, I hope I have succeeded, and I hope they like it.
I started with the background on a snippet of white card and I decided to use a Tim Holtz Mixed Media die to pretty up the corner, and then I cut th red mirri card a little bit bigger and attached these two layers to the white square base card. I cut three heart dies from a set by Sweet Dixie, and I generated a sentiment on the computer to add to the smallest heart. I printed it on good quality copy paper and cut it with the same sized heart using a snippet of white card, and added it to the red mirri heart, cut from another snippet. I then used an XCut Embossing folder on the largest white heart called Hearts and Kisses, again using a snippet of white card, which I added behind the others. I finished by cutting a selection of the flowers using more snippets of red mirri and white card with a Sue Wilson die called Cape Daisy and also some foliage using more snippets of white card using her Orange Blossom Leaves die. I arranged them as you can see on the finished card.
Thank you for your visit and I hope to see you again soon.
I am entering the following challenge:
Pixie's Crafty Workshop - No. 334 where we use up some of our snippets of card and paper etc.
I started with the background on a snippet of white card and I decided to use a Tim Holtz Mixed Media die to pretty up the corner, and then I cut th red mirri card a little bit bigger and attached these two layers to the white square base card. I cut three heart dies from a set by Sweet Dixie, and I generated a sentiment on the computer to add to the smallest heart. I printed it on good quality copy paper and cut it with the same sized heart using a snippet of white card, and added it to the red mirri heart, cut from another snippet. I then used an XCut Embossing folder on the largest white heart called Hearts and Kisses, again using a snippet of white card, which I added behind the others. I finished by cutting a selection of the flowers using more snippets of red mirri and white card with a Sue Wilson die called Cape Daisy and also some foliage using more snippets of white card using her Orange Blossom Leaves die. I arranged them as you can see on the finished card.
Thank you for your visit and I hope to see you again soon.
I am entering the following challenge:
Pixie's Crafty Workshop - No. 334 where we use up some of our snippets of card and paper etc.
Friday, 31 August 2018
Hark the Christmas Rose and Winter Edges
Hi everyone. Here are the other two cards which I made for the Chocolate Baroque TV shows last month. I made this first one using one of the new Christmas stamps from Chocolate Baroque called Hark the Christmas Rose, and the second card also has a stamp from the Winter Edges set. The two are completely different in style and show that these stamps are very versatile and by blanking out the name of the music when you stamp, or by cutting round the outside edge of the flowers, you could even use this at any time of the year. Perhaps I will try this in future to see what it looks like doing this.
I stamped it on to a piece of white Frisk Velvet Card using Ground Espresso Distress Ink, and coloured it using a waterbrush and more Distress Inks in Fossilized Amber and some Carved Pumpkin for the flower centres, some more of the yellow with a little Blueprint Sketch into the flower petals, and also some Candied Apple round the edges of the petals. I then used Lucky Clover and more yellow for the leaves, and finally Ground Espresso for the stems. The idea was to get a more vintage look with the colours as the brown DI I used to stamp with mixed with the other colours when I used the waterbrush, but in the end I decided to pull some of the colour back out of the petals because they bacame too dark, and I wanted a lighter look. The tinge of red looks more like pink with all the water, but when dry I was happy with the result.
I finished by adding the sentiment from Let's Get Festive using Candied Apple DI and then spattered some of the brown ink over the background and layered it up on to red and then kraft card before adding it to the white approximately 7" x 5" card.
For this second card I decided to heat emboss it on to kraft card using the Red Glitter EP and it has lost none of the detail. I like red with kraft so I backed it with some, although in the photo it does look dark pink rather than red, but it is definitely a Christmas red.
I folded back the white base card and added the embossed borders starting with the one down the side before adding bits of them to the top and bottom. I used a piece of paper over the other piece of the fold back as obviously it had to be flat for stamping, just so that it didn't stamp on the inside of the fold back piece, though I suppose it wouldn't necessarily have mattered and with hindsight would probably have been easier to keep the card flat, stamp and then fold it back. I then added the border down the inside of the of the right hand side as you can see so that it balanced it up, all done with the same red glitter EP.
I finished by adding the topper to the fold back piece.
Thank you for joining me here today and I hope to see you again soon.
I stamped it on to a piece of white Frisk Velvet Card using Ground Espresso Distress Ink, and coloured it using a waterbrush and more Distress Inks in Fossilized Amber and some Carved Pumpkin for the flower centres, some more of the yellow with a little Blueprint Sketch into the flower petals, and also some Candied Apple round the edges of the petals. I then used Lucky Clover and more yellow for the leaves, and finally Ground Espresso for the stems. The idea was to get a more vintage look with the colours as the brown DI I used to stamp with mixed with the other colours when I used the waterbrush, but in the end I decided to pull some of the colour back out of the petals because they bacame too dark, and I wanted a lighter look. The tinge of red looks more like pink with all the water, but when dry I was happy with the result.
I finished by adding the sentiment from Let's Get Festive using Candied Apple DI and then spattered some of the brown ink over the background and layered it up on to red and then kraft card before adding it to the white approximately 7" x 5" card.
For this second card I decided to heat emboss it on to kraft card using the Red Glitter EP and it has lost none of the detail. I like red with kraft so I backed it with some, although in the photo it does look dark pink rather than red, but it is definitely a Christmas red.
I folded back the white base card and added the embossed borders starting with the one down the side before adding bits of them to the top and bottom. I used a piece of paper over the other piece of the fold back as obviously it had to be flat for stamping, just so that it didn't stamp on the inside of the fold back piece, though I suppose it wouldn't necessarily have mattered and with hindsight would probably have been easier to keep the card flat, stamp and then fold it back. I then added the border down the inside of the of the right hand side as you can see so that it balanced it up, all done with the same red glitter EP.
I finished by adding the topper to the fold back piece.
Thank you for joining me here today and I hope to see you again soon.
Wednesday, 29 August 2018
Robin the Spruce and Serena
Hi everybody. It is nearly the end of another month so time to show some more of the cards I made for the July TV programmes featuring some Chocolate Baroque Christmas stamps, a new one called Robin the Spruce, and one which has been around for a while called Serena.
For this card I have used stamping on to acetate using Black Archival ink. After stamping the image put it to one side and leave it for at least 30 minutes to make sure it is perfectly dry, ask me how I know...lol. I then coloured it on the back using some alcohol inks and a brush, mixing them with a little of the blending solution.
It doesn't have a totally smooth finish but then I backed it with a piece of white card on which I stamped the image and lined them up, which has strengthened the line art. I folded the acetate around the backing piece top and bottom and then added a very little glue down the sides to keep it flat.The alcohol ink colours were Stonewashed, Indigo, Watermelon and Lemonade, and I mixed Butterscotch with a bit of Watermelon to make a brown colour. I then layered this on to another piece of white card before adding it to the white base card.
I added two more of the stamps from the set heat embossing them using Versamark Ink and WOW Silver Metallic Embossing Powder, and then added the sentiment which comes from the Let's Get Festive set, again using WOW Silver Metallic EP.
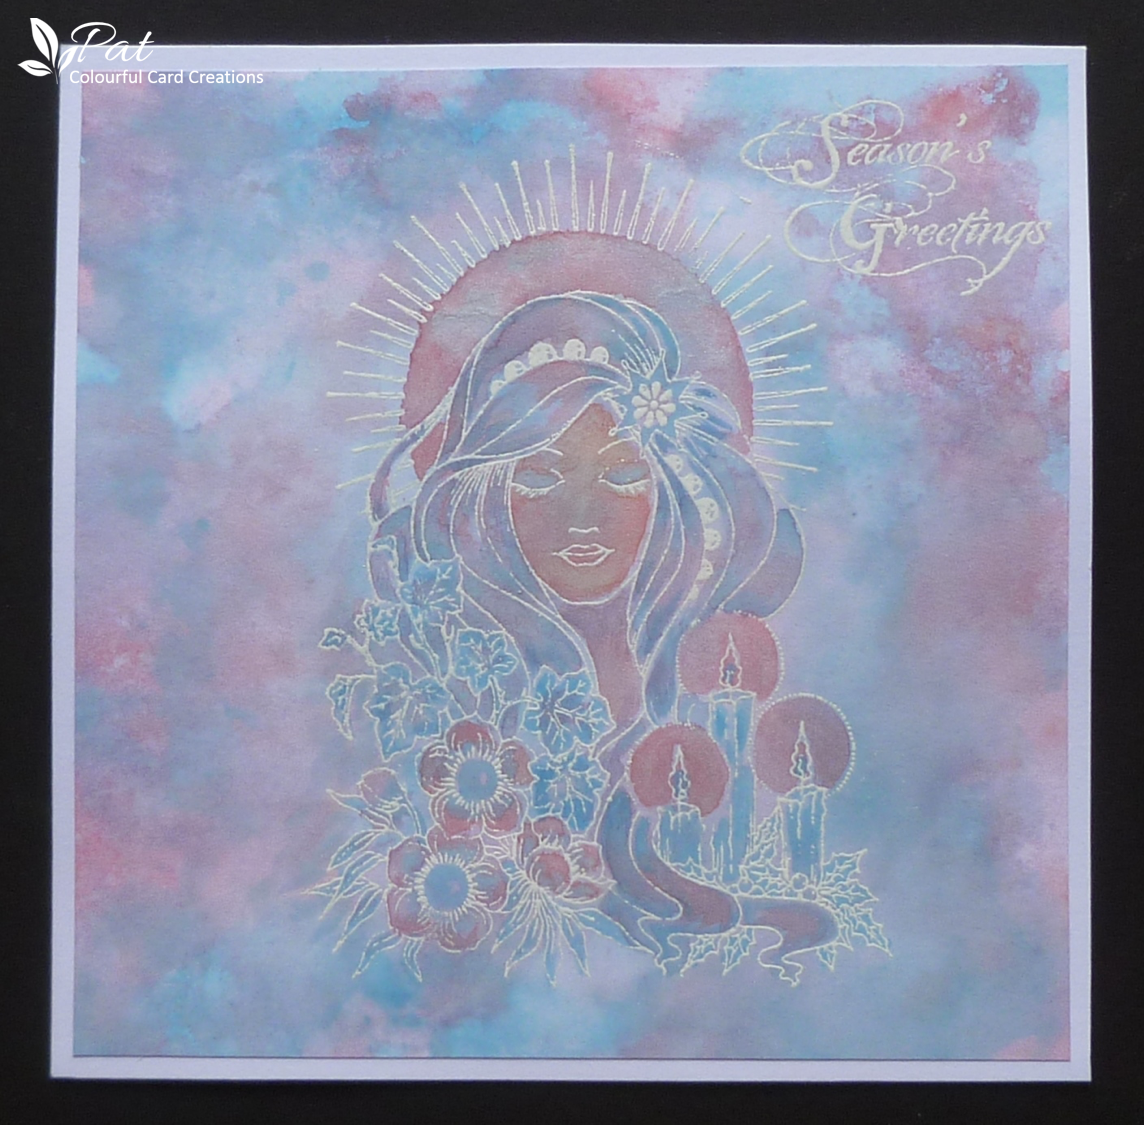
I love Serena which is such a pretty seasonal image, but actually she could be used at any time of the year with different colours, and mine aren't typical Christmas colours either. I used Distress Oxide Inks in Salty Ocean and Worn Lipstick, and then I coloured her with them as well.
I started with a piece of the Frisk Velvet Card and stamped the two colours down on to my glass mat and spritzed with water before dragging my card through them, and I did this several times to colour the card drying in between layers of colour until I was happy with the finished result.
I then heat embossed the image using Versamark Ink and WOW Opaque Bright White Embossing Powder and also added one of the sentiments from the Festive Wishes set, and used the same white EP. After colouring the image I added some Wink Of Stella for the area behind her head and around the candle flames which unfortunately doesn't really show up in the photo.
I finished by adding this to the white base card.
I have a couple more cards which I will try to show before the end of the month.
Thank you for visiting today, and a special thank you for all the lovely comments which I really appreciate.
For this card I have used stamping on to acetate using Black Archival ink. After stamping the image put it to one side and leave it for at least 30 minutes to make sure it is perfectly dry, ask me how I know...lol. I then coloured it on the back using some alcohol inks and a brush, mixing them with a little of the blending solution.
It doesn't have a totally smooth finish but then I backed it with a piece of white card on which I stamped the image and lined them up, which has strengthened the line art. I folded the acetate around the backing piece top and bottom and then added a very little glue down the sides to keep it flat.The alcohol ink colours were Stonewashed, Indigo, Watermelon and Lemonade, and I mixed Butterscotch with a bit of Watermelon to make a brown colour. I then layered this on to another piece of white card before adding it to the white base card.
I added two more of the stamps from the set heat embossing them using Versamark Ink and WOW Silver Metallic Embossing Powder, and then added the sentiment which comes from the Let's Get Festive set, again using WOW Silver Metallic EP.
I love Serena which is such a pretty seasonal image, but actually she could be used at any time of the year with different colours, and mine aren't typical Christmas colours either. I used Distress Oxide Inks in Salty Ocean and Worn Lipstick, and then I coloured her with them as well.
I started with a piece of the Frisk Velvet Card and stamped the two colours down on to my glass mat and spritzed with water before dragging my card through them, and I did this several times to colour the card drying in between layers of colour until I was happy with the finished result.
I then heat embossed the image using Versamark Ink and WOW Opaque Bright White Embossing Powder and also added one of the sentiments from the Festive Wishes set, and used the same white EP. After colouring the image I added some Wink Of Stella for the area behind her head and around the candle flames which unfortunately doesn't really show up in the photo.
I finished by adding this to the white base card.
I have a couple more cards which I will try to show before the end of the month.
Thank you for visiting today, and a special thank you for all the lovely comments which I really appreciate.
Subscribe to:
Posts (Atom)