Pages

Tuesday, 26 September 2023

Autumn is Here

Hi all.  I think that now we are nearly into October we have to except that summer is over and the trees will soon be changing colour, and the mushrooms and toadstools will be popping up, and so this card which I found in my 'drafts' which I hadn't got around to showing is quite appropriate. We have had our son staying with us over from Australia so cardmaking has been suspended for a while as we have obviously been doing other things.  He has less than a week left now before he goes home and we will miss him a lot, but we have been lucky as this is his second visit this year which has been great!  

This features a freebie digital paper which I downloaded from one of the magazines, and I added some toadstools from a Chocolate Baroque set call Autumn Poppy.  I scaled it to fit on my white 6" square card and added the toadstools embossed with Wow Metallic Brass Embossing Powder and coloured them using my Inktense Pencils without any water.  I finished by adding a sentiment with Versafine Vintage Sepia and heat embossed with WOW Clear Gloss EP.  I like the mix of colours in the paper, but not sure there would be a bird's nest with eggs in at this time of year..lol, but apart from that I think it works well.

Thank you for taking a look at my blog today and I'll see you again soon.


I am entering the following challenges:

Allsorts Challenge - Week 747 Four Legged Friends/Anything Goes.
Stamping Sensations September Challenge -  Garden Delights/Anything Goes.
We Love Stamping September Challenge - Trees and Leaves/Anything Goes.

Tuesday, 19 September 2023

Heart and Flowers Anniversary

Hi all.  Here is a recent anniversary make featuring a gelli print and a Sizzix Tim Holtz Mixed Media No. 5 set of three cut into the card dies which I have had for quite a few years.  I also used a Nellie Snellen Multi Frame Heart die set which I have had forever..lol, and also an old Cuttlebug Embossing Folder called Kimmy-Luvs.


I found the gelli plate print in my stash and I think this was one I made when I was using some foliage I picked on a walk several weeks ago, and I used a couple of pieces of fern, and as far as I remember the colours were Lucky Clover and Twisted Citron Distress Inks, and maybe a bit of Pine Needles DI, but didn't make a note of it so a bit of a guess.   The fern print was not very strong and I  decided to add some more inks and a spray or two of water, before I pulled the print for a second time, so it was well covered with the ink, and ended up really as a watercolour background.

Using a piece of white card I cut the floral die twice and then stuck it to the gelli plate background so it showed off the most pleasingly coloured areas in the gelli print through the flower cut out shapes.   I then cut the heart from another piece of white card, using the smaller picot edge heart die, and then ran it through the Kimmy-Luvs EF and layered it onto the centre of the background layer using some Pinflair Glue Gel to give it some shape.  Finally I added the sentiment using Versafine Deep Lagoon Ink and heat embossed with WOW Clear Gloss Embossing Powder, and then added this onto a 6" square card.  It does look rather dark and much darker than the colour looks on the outside of the cube, but I thought that it went OK with the background. 

Thank you for joining me here today and I'll be back soon.   x 


I am entering the following challenges:

Happy Little Stampers September Anything Goes with Dies Challenge.
Happy Little Stampers September Watercolour Challenge - Anything Goes.
The Flower Challenge - No. 84 Use a Die.
Triple B September Challenge - Anything Goes with Birds, Blooms and Butterflies ( any one or all three).
Beautifiul Blossoms Challenge - Anything Goes Flowers/Optional Mood Board No. 9.


Wednesday, 13 September 2023

Lacy Border With Stripes

Hi everybody.  I have a lot of coloured card which actually I don't use very often and so I was looking of ways of using it on cards and I visit Hannelie who has a blog called Desert Diva, and I saw she had made a very pretty card with different width strips and a pretty border design on the outer white layer which you can see here, so I got my thinking cap on and looked through the border dies I have and this one seemed the best.  It is one I have had for a long time but haven't used much and is by Sue Wilson at Creative Expressions, and it is called Pictor with six dies for different styles of fancy edges.

I decided to use just three colours and found some snippets of yellow, blue and green which went together well for a nice bright look.  I started with the fancy border using a piece of card to fit onto a 7" x 5" white card but left it a little wider and longer to give a bit of leeway in the final cutting.  I then got a piece of thin card to build up the pattern of strips and covered that with enough length and width for the top half of the card.  The border die is more suitable for a square card, and with hindsight it would have been better to let it go edge to edge instead of having a margin and I fiddled for quite a while to fit it on and eventually I ended up cutting a piece of the outside edges of the border off, and I decided to fit the layers together and cut it as one piece but it was not easy to cut, but anyway the look is bright and I have managed to use up a few snippets too.  I decided to add a white die cut butterfly and then finished it with a sentiment stamped using Versafine Clair Nocturne ink and heat embossed with WOW Clear Gloss Embossing Powder. 

Thank you for visiting my blog today and I'll see you again soon.


I am entering the following challenges:

Snippets Playgrounds Challenge - No. 462 Where we use our snippets of card and paper etc.
AAA Birthday Challenge - No. 53 Animals ( I wasn't sure whether a butterfly could be called an animal and apparently it can as it belongs to the group called Arthropods).
Happy Little Stampers September Anything Goes with Dies Challenge .
Happy Little Stampers September Birthday Challenge - Anything Goes.
Triple B September Challenge - Anything Goes with Birds, Blooms and Butterflies (any one, two or all three).
Allsorts Challenge - Week 745 Anything Goes/Use Die Cuts.
Simply Clean and Simple September Challenge - Anything Goes/Use A Stencil.

Friday, 1 September 2023

Leaf Wreath Anniversary

Hi there everyone.  I have an anniversary card to show today using a Claritycrafts stencil called Leaf Wreath and I also used a set of heart dies by Sweet Dixie which I bought at The Range a long time ago.  


I decided to use the stencil with my gelli plate, and started by covering it with some Brushos in Sea Green and Violet and sprayed them with some water.  I then laid the stencil on the gelli plate which dispersed the colour around it and lifted it quickly taking a print using a piece of Clarity Stencil card.  It did to a certain degree leave the print on it and I left it to dry, not sure whether I would use it or not.   I looked at it again later and thought that if I added some extra ink through the stencil to highlight the leaves more and then filled in the white gaps with some Distress Inks it would work, so I used Dusty Concord through the stencil and some Broken China and Dusty Concord around the edges and in the gaps in and around the wreath.  I then went round the edges of the leaves with a Sakura Starlight Silver Pen and when rummaging through my bits and pieces I came across a heart frame which I had left over from making another anniversary card and decided to give it an embossed silver finish using WOW Metallic Silver EP and then I used the smaller inner die as a template, marking around it with a pencil onto a piece of scrap card, and with a little extra so the heart frame would sit over it.  I added a sentiment on this again heat embossing it with the Silver EP and then softly blended some Broken China DI around the edges to take the whiteness off, and added the wreath background and the heart onto the white 6" square card.

Thank you for visiting me here today and I'll see you again soon.


I am entering the following challenges:

Simon Says Wednesday Challenge - Anything Goes.
My Time to Craft Challenge -No. 515 Use Die Cuts.

Wednesday, 23 August 2023

Feed the Birds

Hi everybody.  I have a masculine card today featuring some RSPB stamps which came with a magazine a few months ago and which had not been used..tut tut!  It features garden birds and some accompanying images and also an EF with a branch on it and four dies including two which cut out two of the different birds.  I was a little disappointed as there was another sheet of stamps with a lovely background scene and waders and ducks which I thought came with it but it came with another version of it...drat!  I also used another one of my crushed flower/foliage backgrounds, a snippet cut from one of the original A4 pieces, and this has a much better leaf pattern to the righthand side.  The first card is here.

I started by adding some foliage on the background using a couple of silhouette stamps from another freebie set which is a couple of years old but these two particular stamps hadn't been inked before, and I stamped these using Distress Inks - Peeled Paint for those at the top and Forest Moss for the fern type leaves at the bottom.  I then added the blue using Tumbled Glass DI and a blending brush, and then used the two greens to add more depth at the edges where there is green.  I then stamped the bird table and flying sparrow from some snippets of white card using Versafine Vintage Sepia Ink and coloured them with a waterbrush using Brushed Corduroy on the bird table, and then also added Scattered Straw and a tiny bit of Aged Mahogany and Hickory Smoke -  all Distress Inks, on the flying bird.  I accentuated the bird's eye and the lines of the wing feathers using a very fine Black Micron Pen.

I finished by cutting them out and adhered them to the background scene and then added the sentiment to the white card using a stamp from this same set, stamped using Versafine Clair Nocturne Ink heat embossed with WOW Clear Gloss Embossing Powder before adding the finished scene to the card.

Before I go I have a new follower called Donna whose blog you will find here, thank you for becoming a follower Donna, and I'm sure she would love you to pay her a visit. 

Thank you for visiting my blog today and I'll see you again soon.


I am entering the following challenges:

NBUS Challenge - No. 53 Where we use our Never Before Used Schtuff.
Try it on Tuesday Challenge - Let's Go Outside.
Simon Says Wednesday Challenge - Clean and Simple.
Happy Little Stampers August Watercolour Challenge - Anything Goes.
Happy Little Stampers August Birthday Challenge - Anything Goes.
AAA Birthday Challenge - No. 52 Anything Birthday Goes.
Snippets Playground Challenge - No. 461 Where we use our snippets of card and paper etc.

Friday, 18 August 2023

Floral Silhouette Best Wishes

Hi everyone.  Here's a card I made recently using a technique, demonstrated by Chrissie Stokes on YouTube, for making backgrounds using flowers and/or leaves placed between two pieces of absorbent card and put through the die cutting machine, and the resulting moisture leaves some pretty colours and patterns on the pieces of card.  I filled up an A4 sheet and started to roll it through my machine and it was a bit difficult to turn the handle but I managed to do a few turns.  I turned the sheets round and started from the opposite end, but the problem seemed to be in the centre so I cut it in half and put just half through at a time, and this worked better.  I also lined the card above and below with a piece of kitchen towel which stopped it making too much of a mess.  It worked fairly well and there were some areas where you could pick out the shapes of the leaves and stems, but also some bits, especially the buddliea flower I used, left big blobs of intense colour which were not particularly attractive, so I cut these off and am left with a few pieces which I thought would look nice as backgrounds, and this is one of them.


This piece was mostly areas of green and a little light purple and I decided to add a bit of script to the background using a stamp from a freebie set being used for the first time, which came with Simply Cards and Papercraft Magazine No. 239.  I stamped it with Vintage Photo Distress Ink, but I thought it needed pushing back a bit so I sprayed it with water and softened the look.  I also stamped one of the flower images from the set in the top left and bottom right corners using Carved Pumpkin Distress Ink, and just left it as is.  I then stamped the Crafty Individuals Flower Silhouette stamp called Wild Flowers and Ferns using Versafine Clair Nocturne Ink heat embossed with WOW Clear Gloss Embossing Powder.  I finished by adding some colour behind the flowers and around the edges using Fossilized Amber and Carved Pumpkin, and further darkened the edges with a bit of Vintage Photo.  I then added this to a white card 7" x 5", but ended up cutting a little off the length to give it better proportions.  

Not a lot of the original card with the crushed foliage technique can be seen as it is fairly well covered with inks, but I think it gives a good starting point, and maybe the next piece I use I will do a bit less inking to show it off better.  For those of you that might be interested you will find the You Tube video here.

Thank you for coming to visit the blog today and I'll see you again soon.


I am entering the following challenges:

NBUS Challenge - No. 53 where we use our Never Before Used Schtuff.
Stamping Sensations August Challenge - Mood Board/Anything Goes.
Simon Says Monday Challenge - Use Your Favourite Technique - Mine is Stamping.
Triple B August Challenge - Anything Goes using Birds, Butterflies, Blooms (any one, two or all three).
Beautiful Blossoms Challenge - Anything Goes/Optional Mood Board No. 8.

Wednesday, 9 August 2023

Gold Encased Heart Anniversary

Hi everybody.  I have an anniversary card to show today using a Sweet Dixie Heart die and also a corner die which came as part of a box set No. 1 by Sheena Douglass which also included floral and sentiment stamps, a stencil, this die and also a sentiment die and some pretty papers and toppers.  I have used one or two of the floral stamps but this is being used for the first time here.


I started by making the heart which I die cut from a Sweet Dixie set and then using some alcohol inks on my gelli plate I laid a piece of white card on the plate to pick up the inks.  I used watermelon, indigo and Terracotta with also a Rose Gold Mixative and some blending solution to move it around a bit.  I used ordinary card and did this process a couple of times to cover a piece big enough to die cut the heart from, as the card absorbs the ink unlike Yupo where it lays on the surface.  When cut I also added a bit of shimmery pink and lilac eyeshadow using a sponge blender which came with the set of eyeshadows.  This was a tip I got over at You Tube in videos by Chrissie Stokes here and here, if you don't have any pigment powders, and I have to say if you watch the videos you will see that they work really well.  I also added some small bits of glue using a glue pen and added some gilding flakes, but after adding the bits of eyeshadow and buffing a bit they unfortunately disappeared..I don't think I used enough glue although they did seem to be adhering well.

I then added a heart aperture to a piece of white card 5" square, a size larger than my inked heart, and then thought about what I could do to pretty it up and found this corner die from the Sheena Douglass box set.  I cut three and experimented with them as a border around the heart tucking them inside the edge.  I decided to make them gold and used a Brilliance Galaxy Gold ink coating them with it and then heat embossed using WOW Clear Gloss Embossing Powder.  At this point I added the gold sentiment using the same Galaxy Gold ink and Clear Gloss EP, and then added this layer to the 6" square white card.  I didn't think this through properly and I had rather a job manoevring the heart behind the gold border as I had already glued the aperture itself down.  It would have been better to place the heart behind the aperture in the front section held in place with a bit of removable tape and added some wet glue on the back of the heart before removing the temporary tape and glueing it down..anyway I did eventually manage it, but the air was a little blue...lol.

Thank you for visiting my blog today and I hope to see you again soon.


I am entering the following challenges:

NBUS Challenge - Where we use our Never Before Used Schtuff.
Happy Little Stampers August Anything Goes with Dies Challenge.
Addicted to CAS Challenge - No. 243 Shapes.  (I hope this is considered to be CAS enough).
Unicorn Challenge - No. 90 CAS.
613 Avenue Create Challenge - August Anything Goes/CAS (I'm playing the option).
Simply Clean and Simple August Challenge - Anything Goes/Outdoors.

Thursday, 3 August 2023

Underwater Fun

Hi all.  I need a few birthday cards and this could be masculine or feminine I think, and got out a set of stamps which came with Issue 97 of Creative Stamping, and these particular stamps have not been inked before, and in fact very few of the stamps have seen any ink...tut!  I decided it would be a CAS card to fit in with the challenge at Less is More which is Under the Sea, and also the challenge over at Addicted to CAS which asks for Shapes, and the circles in the background fit with that I think.  The colours also fit with Color Hues where the challenge is Teal and Orange.


I started by making a circle mask and using a brush I blended Peacock Feathers Distress Ink through it making four circles big enough to fit the jellyfish into using a piece of white card cut to fit a 6" square card.  I then stamped the jellyfish using Versafine Habanero Ink and  then added some stamped bubbles using the Peacock Feathers DI.  I then coloured it using Spiced Marmalade and Ripe Persimmon DI's having first bleached out the blue from the image which helps to keep the colour clean and bright.  I coloured and then decided to add some white pencil over the little markings on the jellyfish and also water bleached the bubbles.  I finished by adding the sentiment using the Versafine Habanero Ink and heat embossed using WOW Clear Gloss Embossing Powder.

Thank you for visiting me here today and I'll see you again soon.


I am also entering the following challenges:

AAA Birthday Challenge - No. 52 Anything Birthday Goes.
NBUS Challenge - No. 53 Where we use our Never Before Used Schtuff.


Wednesday, 26 July 2023

Braided Christmas Papers

Hi everyone.  I thought it was about time I started including the odd Christmas card and so I set to, and wanted also to use some snippets as the latest Snippets Challenge is a Christmas in July using snippets.  I have had these 12" square papers for an exceedingly long time and I looked at some techniques using strips and came across this blog here which has a video demonstration by Lyssa.  I also used a Sue Wilson die  called Noel Star.

I started with the braiding.  On the video she uses double sided paper which unfortunately I don't have and so I cut a piece of card to fit a DL card, and decided looking at the design to try to replicate it without folding it over.  I cut the four 12" long strips two of each of the patterned paper snippets to build up this pattern.  I started by laying the first two at right angles to one another sticking the pieces down just at the edge overlapping the card to be cut to fit afterwards, adding those onto the card either side of the first two under and over.  I cut each of the strips to tuck just underneath the next one being put down so that it saved on the amount of strips and so that it didn't become terribly thick.  In the end the two strips of each colour was sufficient to cover the card.  I then cut the die from a piece of purple card backed with Stick It adhesive, which I thought went with the background and stuck it to the card and then put the pieces back into the letters and star.  When I put it onto the card I thought that the purple looked a bit dark and heavy so I used a Sakura Starlight gold pen over the whole thing and at least the gold sheen has lifted it a bit, in fact now it looks more like aged metal I think which is OK.

Obviously if you have double sided papers it would be easier to do it as she demonstrates.  I made my strips an inch wide as I wanted to end up with a wider panel to fill the card.  I do quite like the look of it though and it does lend itself to using lots of different papers and you could build up the pattern differently by using some plainer paper strips to break up the pattern as Lyssa has done.  Thank you for dropping by today and I'll see you again soon.  


I am entering the following challenges:

Snippets Playground Challenge - No. 459 Christmas in July using snippets.
Rudolph Days Challenge - July - Anything Christmas Goes.
The Holly and Ivy Christmas Challenge - Anything Christmas Goes.
Merry Little Christmas Challenge - No. 51 Anything Christmas Goes.
Peace on Earth Christmas Challenge - No. 44 Anything Christmas Goes.


Friday, 21 July 2023

Anemones

Hi there.  Hubby and I have just returned from two weeks in Pembrokeshire.  After all the settled warm weather in June it was rather changeable, and unfortunately due to the cool breeze which was evident most of the time, no sitting on the beach and a jacket was needed most of the time, but we did enjoy the break and the scenery especially the coastal scenery is absolutely beautiful.  I always find after a break that the mojo is not anxious to return but I needed a birthday card so got out this stamp from a recent Indigoblu magazine - Mixed Media No. 7, and luckily once I started it went OK.  The set also has dies and a stencil with three different designs and papers and sentiments, and I used the bubbles and the distressed cross hatching stencils in the background, and also some Distress Inks to colour.


Using a piece of mixed media card cut to fit  6" square card I used Tumbled Glass and Shaded Lilac ink spritzed with water and smooshed these over it, doing this several times to build up some soft colour.  I then stamped the flowers, used for the first time, and sentiment using Versafine Clair Nocturne Ink and then added the stencilling around the edges using the two inks mentioned above applied with a blending brush.  I then coloured the flowers using a waterbrush and used slightly darker colours ...Dusty Concord and Broken China on the flowers and Mustard Seed for the centres, and for the leaves Peeled Paint and Forest Moss, and for the slender foliage just a little of the Mustard Seed.  I finished by adding a bit of the Dusty Concord around the edges before adding it to the card.  

Whilst away I did manage to do some commenting and the two posts I put up were scheduled.  Although I did manage some commenting obviously I didn't have so much time and I apologise to those that I haven't yet caught up on.  Thank you for visiting me here today and I'll see you again soon.


I am entering the following challenges:

NBUS Challenge - No. 52 Where we use our Never Before Used Schtuff.
We Love Stamping July Challenge - Fabulous Florals/Anything Goes.
Stamping Sensations Challenge - Summer Flowers/Anything Goes.
Happy Little Stampers July Watercolour Challenge - Anything Goes/Christmas.
Happy Little Stampers July Birthday Challenge - Anything Goes.
Happy Little Stampers July Stencil Challenge - Anything Goes.
Beautiful Blossoms Challenge - Anything Goes with Flowers/Mood Board No. 7.
Triple B Challenge - July - Anything Goes with Birds, Butterflies and Blooms. 
Stencil Fun Challenge - July -Anything Goes/Birthdays.

Tuesday, 11 July 2023

Steam Train Birthday

Hi everybody.  It is hubby's birthday and I bought this steam train stamp from Crafty Individuals called Chunky Steam Train Tag and have been saving it to use the first time for this occasion.  I also used a stencil which came with a recent Indigoblu Magazine Mixed Media 7 and also a Kaisercraft stamp called Background Postmarks but I have had it for quite a while so not sure it will be available now.  


I started by making a 7" x 5" card from a piece of kraft card and used another small piece to stamp the steam train onto using Versafine Vintage Sepia Ink, and then I coloured it with my Inktense Pencils and a waterbrush, and added a few white highlight using the one from the set but with no added water.  I cut around it and then matted it on to dark brown and light orange card.  I then started on the background using Dark Brown, Orange and Emerald Green Brushos on a piece of mixed media paper/card well spritzed with water and patted dry with a paper towel to keep it light.  Next I added the circles stencilling in opposite corners blending several browns including Brushed Corduroy, Tea Dye and Aged Mahogany together with Carved Pumpkin, and then added the postmarks inking just a small portion of the stamp with Toffee Versamark Ink in the other two corners.  I finished by ink blending around the edge of the background with the same brown Distress Inks but added Ground Espresso to the very edges too.  Finally I mounted it all up and added a sentiment using the Versafine Vintage Sepia Ink heat embossed with WOW Clear Gloss Embossing Powder and also used the Ground Espresso round the edges.

Thank you for visiting my blog today and I'll see you again soon.


Monday, 3 July 2023

Toucan Do It!

Hi everybody.  It is our 41st anniversary and I made hubby this card using a set by Lawn Fawn called Toucan Do It which I was lucky enough to win in a giveaway over at Marjan's Blog and I thought the toucans would make a fun card.  

I started by cutting a piece of blue card to fit a 6" square white card and decided to emboss a heart onto it using a Sweet Dixie die large enough to fit the toucans inside...not something I have done very often but it worked well.  I placed the first toucan and heat embossed using WOW Metallic Platinum Embossing Powder, and then masked it to place the branch it is perching on, and at the same time I placed the other flying toucan and the little hearts, and also the fun sentiment..all from the same set and also heat embossed with the Platinum EP.  I then ink blended around the card to frame the heart using Blueprint Sketch Distress Ink applied with a blending brush, and then to darken the edge Chipped Sapphire DI.  I attached this to the white card and then decided to add a die cut sentiment, and in order to match it to the other embossing I covered a piece of white card with Versamark Ink and heat embossed it with two layers of the Platinum EP.  I also added a piece of Stick It Adhesive to the back before die cutting it, and then I attached it to the card as you can see just slightly overlapping the embossed heart.

Thank you for dropping by today and I'll see you again soon.


Wednesday, 28 June 2023

Nature's Best

Hi all.  I have another card for a female birthday and using another gelli plate background which was intended to feature grasses picked whilst on a recent walk, but I think by the time I had arranged them on the plate over a layer of paint, it was a bit dry and only picked up the shape of a couple of the seed heads, so I ended up aborting that and just added a little blue and yellow ink in certain areas over the top and decided to add one of the wild flowers from a set by Art Journey called Nature Flowers, and also a couple of images from a set called Grasses, and also a couple of little bees from a set by Chocolate Baroque called Honey Bee.  The three images on the white layer were a little bird given as one of five little freebie stamps when I bought a Crafty Individuals stamp recently , and also another larger bee from the Honey Bee Chocolate Baroque set and a small maple leaf from another of their sets Nature 1.

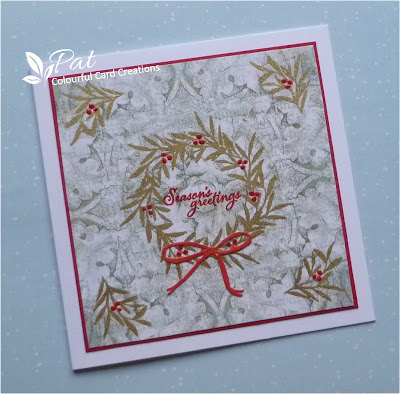
I started by cutting the circle from a piece of white card approximate 5 1/2" and the circle approimately 4", large enough to accommodate the little scene but leaving a reasonable border all round.  I did cut it so that there was a bit more space at the bottom for the sentiment across the bottom right corner.  I stamped the two Queen Anne's Lace flowers (otherwise known as Cow Parsley) a little way up from the bottom of the gelli plate piece and I just kept putting the circle over the top so I could see if they looked to be in the right place.  Once I had done this I added the grasses using a couple of the stamps below and around the flowers, and I did use a Black Micron Pen to extend one of the flowers stems.  I finished by added the branches which also come from the same set and made sure that I placed them to fit around the circle, and finally the sweet little bees..all this was stamped using Versafine Clair Nocturne Ink.  I then stamped the extra little images on the white layer around the circle and added a sentiment which was from a set of stamps which came with a magazine..a Creative Stamping one from a few month's ago I think.  I decided for these images to use a Versafine Smokey Gray Ink as I thought it would be a little softer, but to be honest don't think it made a lot of difference. 

Thank you for your visit today and I'll see you again soon.


I am entering the following challenges:

NBUS Challenge - No. 51 Where we use our Never Before Used Schtuff (Both bee images and the little bird are all NBUS items).
We Love Stamping June Challenge - CAS/Anything Goes.
Stamping Sensations June Challenge - Around the World/Anything Goes.
Allsorts Challenge - Week 734 Bunch of Flowers/Anything Goes.
Happy Little Stampers June Birthday Challenge - Anything Goes.
Try it on Tuesday Challenge - Summer Blooms

Monday, 19 June 2023

Triangular Floral

Hi everybody.  I needed another quick card for a birthday girl and thought I would use the technique highlighted this month over at the  Group of Seven Cardmakers which is ink blending on coloured card.  I used a stamp which came as part of a box set by Sheena Douglass..actually her first.

I found a piece of pink card and cut it to fit a 7" x 5" white card.  I stamped the lilies and a sentiment from the set with Versamark and heat embossed using WOW Silver Metallic Embossing Powder and then got out a couple of Distress Inks - Picked Raspberry and Dusty Concord, and using a blending brush I began with the pink and gradually built up the colour around the edge and in towards the flowers, and then built up more colour around the edge with the purple.  I then did some splattering with water, not too dramatically, but it does show up quite well, and I attached it to the card...done!

As I said a quickish card with a technique which works well particularly with an embossed image.  I was tempted to add a little of the pink and purple on the flowers but decided to leave as is and let the inking and spattering be the main feature of the card.

Thank you for visiting my blog today and I hope you'll visit me again soon.


I am entering the following challenges:-

Allsorts Challenge - Week 733 - Blooms, Bees and/or Butterflies/Anything Goes.
We Love Stamping June Challenge - CAS/Anything Goes.
Stamping Sensations June Challenge - Around the World/Anything Goes.
The Flower Challenge - No. 81 Use Your Favourite Flower.


Wednesday, 14 June 2023

Perching Kingfisher

Hi everyone.  I have been a bit busy with things recently which have kept me from my cardmaking rather, but I suddenly realised that I needed a card for a female relative, and decided to use a gelli plate background which I made recently and a NBUS Kingfisher image which came free with a few other little offcut stamps with another stamp I bought recently from Crafty Individuals, as did the Wild Flowers and Ferns stamp which I used here which was a special offer with the order.  


I made this gelli print background using acrylics and some grasses and cow parsley but it didn't work at all well, and the darker areas were what was left of the outline of the flowers and I ended up using some more green paint over the top to see if that looked more usuable, and that was how it was left.  I stamped the kingfisher and coloured using my Inktense Pencils without any water, and then added the wild flowers to either side, and as their were some white patches I added some more green, blue and yellow pencil in places but decided that I would get a better finish using some Distress Inks and so I used Twisted Citron in the centre and darkened the edges with Lucky Clover.  I finished by adding the sentiment using Versafine Clair Nocturne Ink heat embossed with WOW Clear Gloss Embossing Powder.

This was a quick card but I was quite happy with the way it eventually turned out, and a definite improvement on the initial look of my failed print..lol.  Thank you for visiting me here today and I'll see you again soon.


I am entering the following challenges:

NBUS Challenge - No. 51 Where we use our Never Before Used Schtuff. 
Allsorts Challenge - No. 732 Birthdays/Anything Goes.
We Love Stamping June Challenge - CAS/Anything Goes.
Stamping Sensations June Challenge - Around the World/Anything Goes.
Happy Little Stampers June Birthday Challenge - Anything Goes.
Triple B June Challenge - Anything Goes - Birds, Butterflies and Blooms (at least one of the three).

Wednesday, 31 May 2023

On Safari

Hi everyone.  I made this card for our son whose birthday was actually yesterday, and as I had just bought this new Creative Stamper Magazine and the stamps had some fun images of a zebra, giraffe, lions and a cheetah as well as some other coordinated images including these leaves,  I thought that one of these would make a nice masculine card, so in the end I opted for the giraffe which together with the zebra are images by Crafty Individuals included as part of the set this time.  


On looking through the magazine I saw that one of the designs was a CAS card and I liked the look of the giraffe peering out from the leaves.  I stamped the leaf below it first then masked it before stamping the giraffe and then masked that before adding the other leaves surrounding it using some Versafine Vintage Sepia ink.   I then coloured it using a set of brush pens by Staedler scribbling with them on my glass mat and picking up the colour using a waterbrush.  I also added some softly blended inks around the giraffe using some yellow behind its head and some blue around that, and then finished with the sentiment again stamped with the Vintage Sepia and heat embossed with WOW Clear Gloss Embossing Powder.  

I sent the card to Australia three weeks ago thinking that should be more than enough time, but by the weekend it still hadn't arrived, but luckily yesterday it turned up...phew!  Thank you for dropping by today and I hope to see you again soon.


Thursday, 25 May 2023

Chequered Chess

Hi everybody.  A masculine card today for a family birthday coming up shortly.  I decided to use this Aall & Create Chess Border Stamp and also an embossing folder called Chequered which is by Papermania and I have had it for a long time but I think this is the first time I have used it..tut tut!


I decided to make the background using acrylic paints on my gelli plate.  I covered the plate with orange and opened the embossing folder and using the embossed side I laid it on the gelli plate, lightly pressing it to remove some of the paint, laying it down a second time to cover the plate, and then pulled the print.  It worked well and I cut it down to fit my 6" square white card and then stamped the image using some Versafine Smokey Gray Ink and heat embossed it with WOW Clear Gloss Embossing Powder.  The stamp is very long so I only inked part of it.  I darkened the edges with some blended Ripe Persimmon and then Hickory Smoke Distress Inks and used some beneath the image to ground it, and also added the Ripe Persimmon behind the stamping and added some White Inktense Pencil to highlight the image a bit.  I then added the sentiment using the same Smokey Gray Ink and Clear Gloss EP.

Thank you for coming to visit my blog today and I'll see you again soon.


I am enterering the following challenges:

NBUS Challenge - No. 50 Where we used our Never Before Used Schtuff.
Colour Hues Challenge - No. 64 Orange and Slate Grey.
Allsorts Challenge - Week 729 Absolutely Anything Goes for their 14th Birthday!
We Love Stamping May Challenge - Anything Goes/In the Garden.
Stamping Sensations May Challenge - Anything Goes/Stencil.


Thursday, 18 May 2023

Wild Flowers and Ferns

Hi all.  I needed a birthday card for a family member and I thought I would use this pretty silhouette flower stamp from Crafty Individuals which came free with another stamp I got, and there were also some lovely papers too, being given away as an extra over the Coronation weekend.  I wasn't sure whether I would get the extra things as it was an 'only whilst stocks last' offer, but I was lucky and there were a few offcut stamps too which I will definitely use and which I was not expecting to receive at all, and very generous of them.

I started by doing a background on my gelli plate using three alcohol inks, and adding blending solution and using a puffer I moved them around to make a circular shape and then using a normal piece of white card, not yupo this time, I laid it down and rubbed over it to transfer the inks which they did very well.  I have not tried using my gelli plate with alcohol inks before but it was a technique being used over at the Group of Seven Cardmaker's Blog this month and so I thought I would try it.  I then added the silhouette flowers and a sentiment using Versafine Olympia Green ink and heat embossed it with WOW Clear Gloss Embossing Powder, and added it to a 6" square card.  As an afterthought I decided to added three little birds in the sky which I did using a Black Micron Pen.

There is one thing to bear in mind when using alcohol inks on a gelli plate and that is there can be some staining and it seemed to be the yellow I used which only lifted slightly when rubbed with some more of the blending solution.  It doesn't greatly matter except that the colours added to the plate in future will look a little different because of this staining.  Thank you for visiting my blog today and I'll see you again soon.


Group of Seven Cardmakers - Not a challenge but they have left a link to download what you make.

I am entering the following challenges:

Less is More Challenge - No. 483 Spring.
We Love Stamping May Challenge - Anything Stamped with the option of In the Garden.
Stamping Sensations May Challenge - Anything Stamped with the option to Add a Stencil.
Addicted to Stamps and More Challenge - No. 446 Make Your  Mark.

Wednesday, 10 May 2023

Time for a Birthday

Hi all.  I made this card using a Sheena Douglass Embossing Folder called Trailing Time.  It was a snippet of white card I embossed when making this card here, and I put it aside and when sorting through some things I found it, so I thought it would be good to use it on this card. 


I decided to ink up the piece and used some Tumbled Glass Distress Ink applied with a brush, and I then  used a darker blue fine liner pen from a set by Docraft to colour the stamens of the flowers, and I then added this snippet of similarly coloured blue card and added it to a 5" x 7" card, and finished with a die cut sentiment using another snippet of the same card.

Thank you for joining me here today and I'll see you again soon.


I am entering the following challenges:

Snippets Playground Challenge - No. 453 Where we use snippets of card and paper etc.
Can You Handle The Pressure Challenge - Anything Goes/Baby.
Happy Little Stampers May Birthday Challenge - Anything Goes.
Allsorts Challenge - Week 727 'April Showers Bring May Showers'.
Triple B May Challenge - Anything Goes with Birds, Butterflies and Blooms (any or all three).
The Flower Challenge - No. 80 Pretty Pastels.
Cardz 4 Galz Challenge - No. 198 US Mother's Day/Flowers for a Friend.


Wednesday, 3 May 2023

Dolphins Rocker

Hi everyone.  This is a rocker card featuring dolphins, and dolphins do 'rock' too as I love them.  This is a masculine birthday card for my brother-in-law and at first I was not sure what to do, but I came across a rocker with an added piece of acrylic round a circular shape on the rocker and with the dolphins leaping round the edge of it, and I did try to find it again but had a fruitless search online.  I decided on something simpler and made the rocker base from a 6" square card rounding the bottom using a bowl as a template and cutting the base with scissors.  I then found a piece of card which I had recently inked with a technique I saw by Chrissie Stokes using spray starch and powder colours with wonderful shimmery mica and a piece of crinkled cling film over the top and left to dry...you will find it here.   I used blue, gold and white Pixie Powders on mine and was pleased with the results and thought it had the look of the sea.   I also used a dolphin image from a set of stamps that came with Creative Stamping Magazine No. 97 Beneath the Waves.


I wanted to create a background with waves and a large wave with the dolphins leaping in front, and having looked online I found a children's freebie image of a dolphin and a large wave and used this printing it to fit the width of the rocker and I just cut out the piece I wanted and pencilled round it on the back of the background piece adapting it a little to fit on my rocker base, and then I cut it out.  I wanted to add some texture to the crests of the waves and added some Opal White Perfect Pearls to them and wasn't so happy with that as it wasn't white enough, so I used some white acrylic paint over the top, and then added some more randomly over the bottom section to give the sea some movement and then added some more bits of colour using some Distress Inks in several blues applied with a waterbrush.  I then added this to the rocker base.

I stamped the dolphins in Versafine Smokey Gray ink and coloured with some grey tones of Distress inks again using a waterbrush, and I cut them out and added them to the card.  I finished with a stamped sentiment using Versafine Clair Nocturne ink.  I was going to use Smokey Gray but there is a lot of mica shine on the base and I wanted the sentiment to stand out well so thought the black would be better.

Thanks for visiting me here today and I hope to see you again soon.


I am entering the following challenges:

Cardz 4 Guyz Challenge - No. 321 Get Messy - Inks, Paints, Sprays.
The Male Room Challenge - No. 174 - Animals.
Simon Says Stamp Wednesday Challenge - No Patterned Paper.
Simon Says Monday Challenge - Paint It.
Happy Little Stampers May Watercolour Challenge - Anything Goes/Flowers.
Happy Little Stampers May Birthday Challenge - Anything Goes.


Wednesday, 26 April 2023

Cheers Anniversary

Hi everybody.  I needed an anniversary card and I recently got hold of a copy of a Sheena Douglass Magazine, the first she has done, which comes with stamps, a stencil, a corner and layered sentiment dies and also some pretty papers.  I happened to spot it when I was food shopping and it just happened to fall into my basket...lol.   I decided to use one of the five large florals stamps which come with it...there are also a set of sentiment stamps,  and I also used the stencil in the background both being used for the first time.

I stamped the image using Dried Marigold Distress Ink, as I wanted the lines to be soft, but to be honest the outlines did end up darker than I intended, but I went along with it.  I coloured it using more Distress Inks taken from my glass mat using a waterbrush.  I then fussy cut it out.  I decided to use a DL card and I cut a piece of white card a little smaller and dry embossed the stencil which is a nice large square one, but I had to extend it to cover the DL card.  I then ink blended with a brush using Dried Marigold DI and then I laid the stencil back over and used Picked Raspberry DI, the same as I used on the flowers, through the stencil in two corners.  I added the sentiment stamped with Versafine Smokey Gray Ink, and luckily even though it was stamped over embossing it came out well  There were just a couple of places where I used a grey fine liner to fill in a little gap, and lastly adhered the layer onto the card and added the glass and flowers image to finish the card.

Thank you for coming to visit me here today and I'll see you again soon.


I am entering the following challenges:
 
NBUS Challenge - No. 49 Where we use our Never Before Used Schtuff.
Can You Handle The Pressure? Challenge - Anything Goes with Embossing/Baby.
Happy Little Stampers April Watercolour Challenge - Anything Goes/Die Cuts.
Happy Little Stampers April Stencil Challenge - Anything Goes.
Triple B Challenge - Birds, Butterflies and Blooms including at least one of the these three.
Crazy is our fame - Stencils are our game! Challenge- April - Anything Goes using a Stencil/Patterns.
We Love Stamping April Challenge - Anything Stamped Goes/Birds and Animals (real).`
Stamping Sensations  April Challenge - Anything Stamped Goes/CAS.
Addicted to Stamps and More Challenge No. 444 Any Occasion.

Sunday, 16 April 2023

Corner Fold Pop Up

Hi everybody.  I decided to give another shaped card a go and another which I happened to see on line and thought didn't look too difficult...you will find it here.  I needed to have it ready by last Saturday and this was Friday evening and I suppose put myself under pressure and everything that could go wrong did go wrong.  I used a Hearts and Kisses Embossing Folder by Xcut, a Sweet Dixie set of heart dies which I have had for ages, a set of stamps which came free with the Creative Stamping Issue 109 called Versa-Tiles, and a set of frames by Clarity which I have used a couple of times recently, and also a set of stitched square dies from The Works.

I started with the shaped base card for which I used a white 6"square card with the fold at the top.  I decided on how large I wanted the angle to be and I used my scoreboard and when creased you fold the whole corner piece inwards.  I then decided on what to put on the card, and as it is an anniversary card I decided to cut three hearts to sit across the diagonal fold at the top of the card.  I used the Versa-Tiles set picking out three designs which were big enough to allow me to cut a small heart from each, and I stamped them using Versafine Satin Red ink, in fact I used this one red ink throughout, and used some snippets of white card to stamp on to.

I then used the embossing folder and a snippet of white card and in order for it to cover the front of the card I had to run it through twice.  I made a mess of the first one by getting a crease from the edge of the folder which showed up when I ran it through again..I have a new die cutting machine and I am still getting used to it..well that's my excuse..lol.  I did it again embossing it correctly then I had to cut the corner out to fit the front of the card and I cut it completely wrong.  Did it all again and this time it was correct!!  I did think about adding colour but decided against it and glued it to the front of the card and added the three hearts being careful that they didn't protrude too far above the card otherwise it would not have fitted in the envelope. 

I had an experiment with one of the Frame-It die cuts, the largest which has heart cut outs, and cut it it in half along each side and glued it together overlapping to match the pattern so it ended up approximately 3" square and it does look OK, and then decided to use the Satin Red ink rubbed over it and after it dried I added it to the card on end to form a diamond shape which fitted on it more neatly, and luckily the stitched square from the set, the second smallest, fitted inside it with just a little space all round, and I then added the sentiment stamped using the red ink.


As you can see there is the space inside to add something which pops up when it is opened up, and I found a set of crocheted lacy butterfly embellishments which I bought at The Works ages ago and I used one of these cutting a backing shape from a snippet of white card to fit behind it, and I coloured this on both sides with the red ink, and when dry I added it onto the card.  It can overlap the edge of the card as when it is shut it folds down inside.  I finished by adding an insert and cut the corner off of it so that it fitted around the 'v' shaped crease in the corner, a bit fiddly but I got there in the end.  I took a photo of the card prior to adding this.

Sorry this was rather a lengthy post and I quite understand if you decided to skip my ramblings, and maybe you may have seen this shape of card before and know how it works.  Anyhow I have left a link to where I saw this and all will become clear when you watch this.

Thank you for visiting my blog today and I'll see you again soon.


I am entering the following challenges:

Snippets Playground Challenge - No. 452 where we use our snippets of card and paper etc.
Allsorts Challenge - Week 724 Anything Goes/Create your own background.
Simon Says Wednesday Challenge - Shaped Card.
Creative Creases Challenge - No. 55 Anything Goes with a Fun Fold.
Crafty Calendar Challenge - April  - Die Cuts.
Happy Little Stampers Anything Goes with Dies Challenge.