Pages

Saturday, 30 July 2022

Joy To The World

Hi there everyone.  I have a card for the Rudolph Days Challenge run by Mo over at Scraps of Life by Scrappymo and it runs from the 25th to the end of each month.  I have used a very old set of Hot Off The Press stamps which were a freebie eons ago and also a Sue Wilson die from her Festive Collection called Joy which I have just bought from a local shop and is having its first outing.  They don't have a terrific range of dies, mainly those by SueWilson and they are mainly ones which have been out for quite a while.  This one was there when I visited the shop several months ago and I resisted the temptation to buy it but it was still there this time so it had to come home with me..lol.  
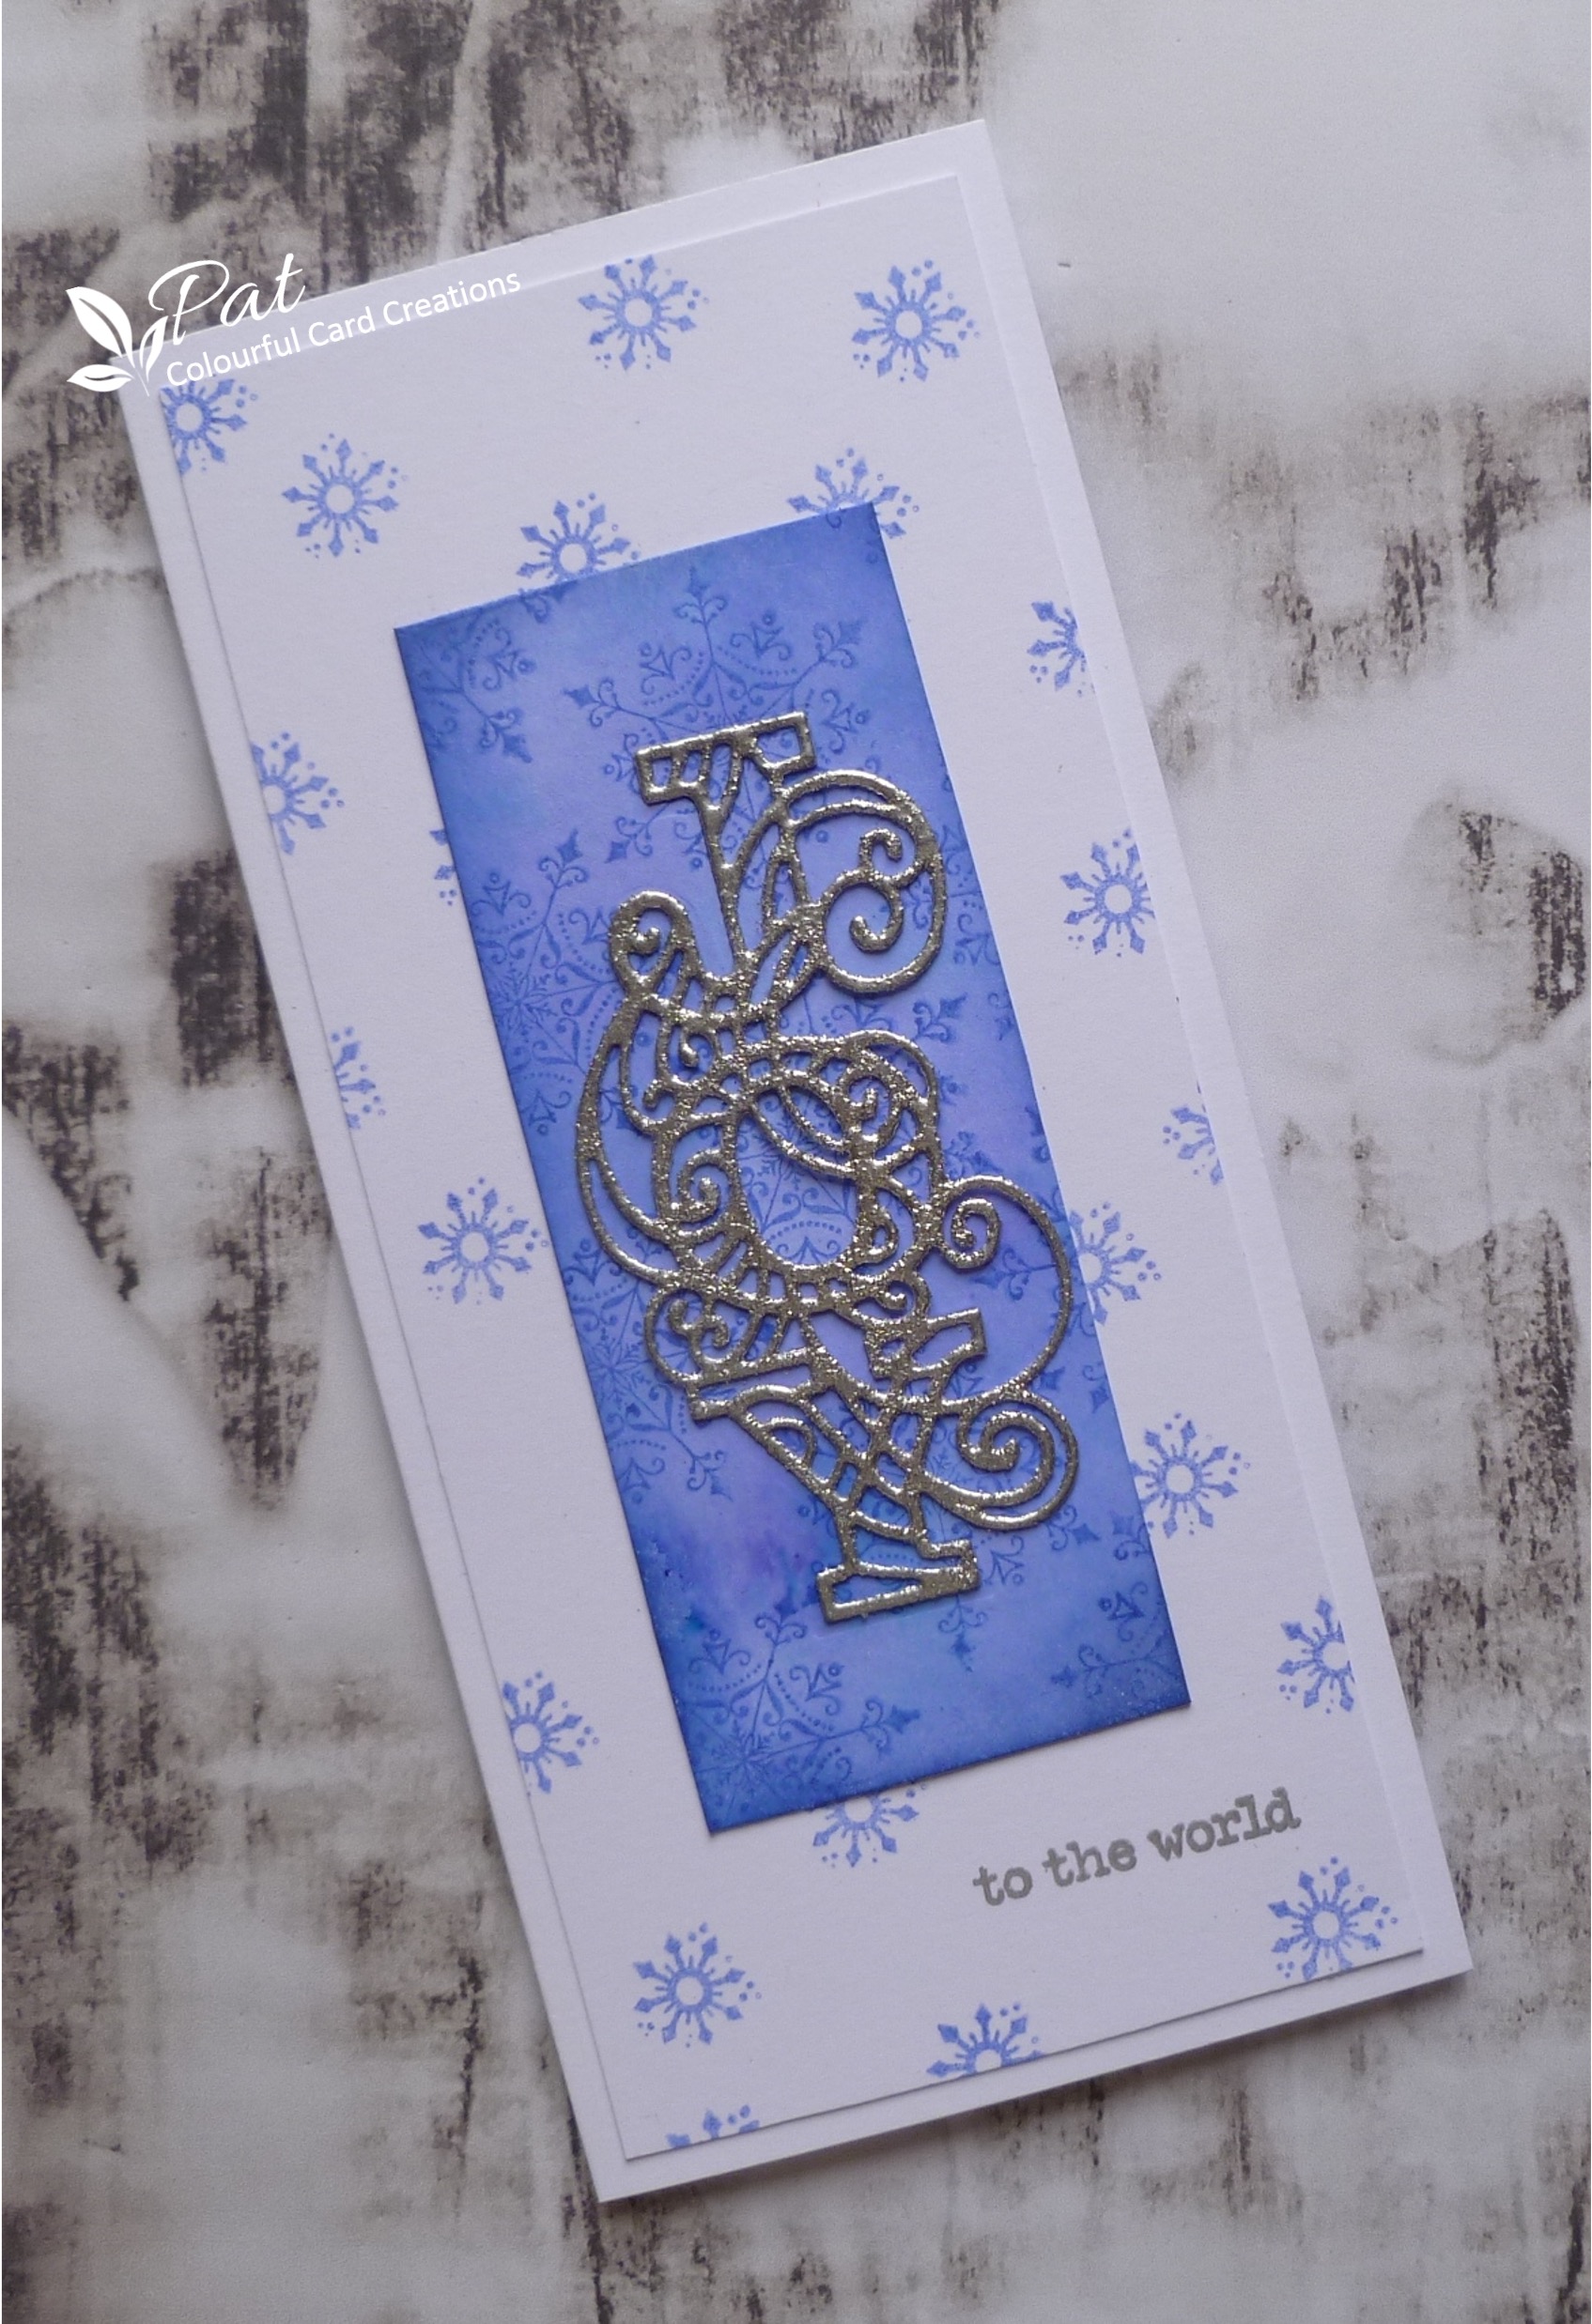

I started with the 'Joy' die, just the word and flourish outline, there is another die with the separate letters which you can use on their own or together with the outline die.  I cut it from a snippet of white card and then I embossed it with WOW Silver Glitter Embossing Powder, a couple of layers to build it up a bit.  I then found another snippet of white card to which I added some Brusho Powders using Ost. Blue and Violet, two of five new colours I bought whilst on holiday and used for the first time here, and then added the large snowflake using Blueprint Sketch Distress Ink and I also added some blended around the edges.  I then made the under layer of the background using another snippet of white card and a smaller snowflake from the set randomly stamped, again using the Blueprint Sketch DI, and also added the sentiment which I came across on another freebie set and which completed the phrase which was handy.  This time I used ordinary Silver Metallic EP.

Thank you for taking a look at my blog today and I'll see you again soon.  Just a reminder that the giveaway finishes tonight at midnight..you will find here.


I am also entering the following challenges:

Snippets Playground Challenge - Christmas in July using up our snippets of paper, card etc.
NBUS Challenge - No. 40 Where we use our Never Before Used Schtuff.
The Holly and Ivy Christmas Challenge No. 120 Anything Goes.
Merry Little Christmas Challenge - No. 45 Anything Christmas Goes.

Tuesday, 26 July 2022

Bismark Birthday

Hi there.  I was tidying up my working space and came across a digi image which is one by Mo Manning which has been sitting waiting to be used since before Christmas when I made this card here and I ran this extra one off but it never got used.  It is actually a Christmas image but I think it works OK as the only slightly Christmasy thing are the trees on the scarf.  I coloured it with some new pencils I bought whilst on holiday which are Polycolour by Koh-I-Noor and I think for the price they are pretty good.  


As you can see it was a simple card with just a matted layer behind the image and the added sentiment stamped using Versafine Majestic Blue Ink heat embossed with WOW Clear Gloss Embossing Powder.

Thank you for visiting my blog today and I hope I'll see you again soon.

P.S.  If anyone is interested I have a giveaway here which I will be keeping open until midnight on the 31st July but sorry only for followers or regular visitors living in the UK, so please check it out. 


I am entering the following challenges:

TGIF Challenge - #tgifc378 - Just a Few of My Favourite Things (I love cute animals and colouring).
Addicted to Stamps and More Challenge - No 434 Any Occasion.
Ellibelle's Crafty Wednesday Challenge - July - Anything Goes (no twist).
Seize the Birthday Challenge - No. 243 Colour Challenge/Anything Goes (no topping).


Saturday, 23 July 2022

Giveaway

Hi everyone.  I bought a Paper Crafter magazine earlier in the year Issue 172 which had a Docrafts Papermania Summer Florals set of note cards and floral greeting cards and some matching double sided papers, as well as toppers, tags and sentiments and also a lovely floral stamp and an embossing folder which measures 5" x 2".  They had also included a set of stamps by Sheena Douglass which I subsequently found out were originally a giveaway with a Crafts Beautiful magazine in November last year, which was what prompted me to get it, and these I am keeping.  To be honest I don't do much actual paper crafting and as they are good quality and very pretty summer florals I thought that someone else would appreciate using them, so I have taken some photos of the packaging and the contents and will leave this on here for a week or two so that if anyone would like this and you leave me a comment and also let me know if you would like the Paper Crafter magazine as well which does have some related articles, and I will draw a name out and send them to you.  I'm sorry but just those that are in the UK please, and preferably someone that already follows or at least visits me on a fairly regular basis. 


Thanks for your visit today.  I have now decided that I will keep this open until midnight on Sunday 31st July.


Wednesday, 20 July 2022

Hole In One

Hi everybody.  Sorry to have been rather quiet lately but we have been away for nearly three weeks with a couple of nights in Shropshire near Ludlow, then two weeks on Anglesey in Wales and finished with a three night stay in The Wirral so we could visit Chester and we also visited New Brighton and Southport as they were places hubby used to visit as a child..mind you I don't think they are quite the same now as they were then but it was good for him to reminisce a bit...lol.  I did manage a few visits but with less time to spend got rather behind so will try and catch up over the next week or so.  We only arrived home yesterday evening and are still in the sorting out phase.  The heat was rather sapping in the last couple of days with temperatures in the mid 90s but we managed to see quite a bit.  When hubby sorts his hundreds of photos out I will select a few to show. 

A masculine card to show you today for a friend who is a regular golf player so got out some sport related stamps which came with Craft Stamper Magazine over a year ago but naughty me they are only just getting their first outing.  There were only three which related to golf..a flag in the hole and a golf ball,  and also a silhouette male golfer, so those were what I used. 


I started by cutting a piece of white card just a little smaller than my DL card and placed the four images using my stamp platform and used Versafine Clair Nocturne Ink which I then heat embossed using WOW Clear Gloss Embossing Powder.  I then added some Mowed Lawn Distress Ink using a blending tool around the golfer and extended it softly above the sentiment, and then I made a negative mask and blended more heavily on the green and then added some Candied Apple DI to the flag.  I finished by adding some Salty Ocean DI to the sky, fairly lightly, though in real life it looks darker than in the photo.  I then decided to blend a bit more green ink around the green too.

It's not a very exciting card but I thought using a DL shape would give the impression of the ball going a distance to the green, although the ball does look quite large against the size of the hole..lol.   Thank you for coming to see my blog today and I'll see you again soon.


I am entering the following challenges:

We Love Stamping July Challenge - Anything Stamped with the Option of Hot Sunny Colours.
Addicted to Stamps and More Challenge - Any Occasion.
NBUS Challenge - Where we use our Never Before Used Schtuff. 

Sunday, 3 July 2022

Our 40th Anniversary

Hi there everyone.  It's our 40th anniversary and I decided to use a new to me technique for hubby's card which I found after watching Marion Emberson using embossing powders which she calls embossed pouncing.  I used some red and silver sparkle and also a holographic embossing powder and some Pebeo Silver wax, and also the lattice stamped heart from a Chocolate Baroque set called Geometric Trading Hearts.  I used Scarlet Red, Brilliant Red and Orange Brushos for the background and finished with a number made using a piece of scrap white card and the Red Sparkle Embossing Powder (two layers).  You also need some baking parchment to sandwich the powders in between before heating and pouncing with the heat tool.  You do have to be careful to make the pouncing movement quite quick so that the tool does not overheat.  It becomes clearer when you watch the video.

I made the heart as seen on a Marion Emberson video here and I kept clipping away bits until I was happy with the look.  I then reheated it and added the lattice pattern which probably doesn't look like it but it gave it some added texture, and then I added the silver wax rubbed over the surface and when reheated it did shrink one side and left some holes but I thought it looked OK like that.

For the background I just sprinkled the Brusho powders and added some water, sparingly and left it to dry.  I then added just a fine sprinkle of the WOW Silver Sparkle EP and very carefully heated it from underneath until it melted enough for me to go in on the top, and in real life it does have a lovely bit of sparkle but unfortunately doesn't really show in the photo.  

I finished by adding the number from the piece of Red Sparkled Card and stamped the sentiment using a Versamark Red Satin ink heat embossed with WOW Clear Gloss EP.

Before I go I would like to introduce and thank two new followers, first Crafty Linby, whose blog you will find here, and Jeanne H. who you will find here.  Some of you may already know them but if not I'm sure they would love you to visit.  Thank you for your visiting my blog today and I hope to see you again soon.

P.S. Just an apology...I am using an older laptop for the next couple of weeks and I have found I have a problem trying to comment on any blogs which have the new style of comment box..i.e. the ones with just a line and not the old style box to put the comment in.  I click to start typing and nothing happens, so if you don't hear from me that is why.  If anyone knows of a way to fix it please let me know.

P.P.S. Ignore the above as I seem to have fixed it by using Chrome instead of Firefox.  Read up a little bit and at the moment all is working fine.


Wednesday, 29 June 2022

Musical 80th

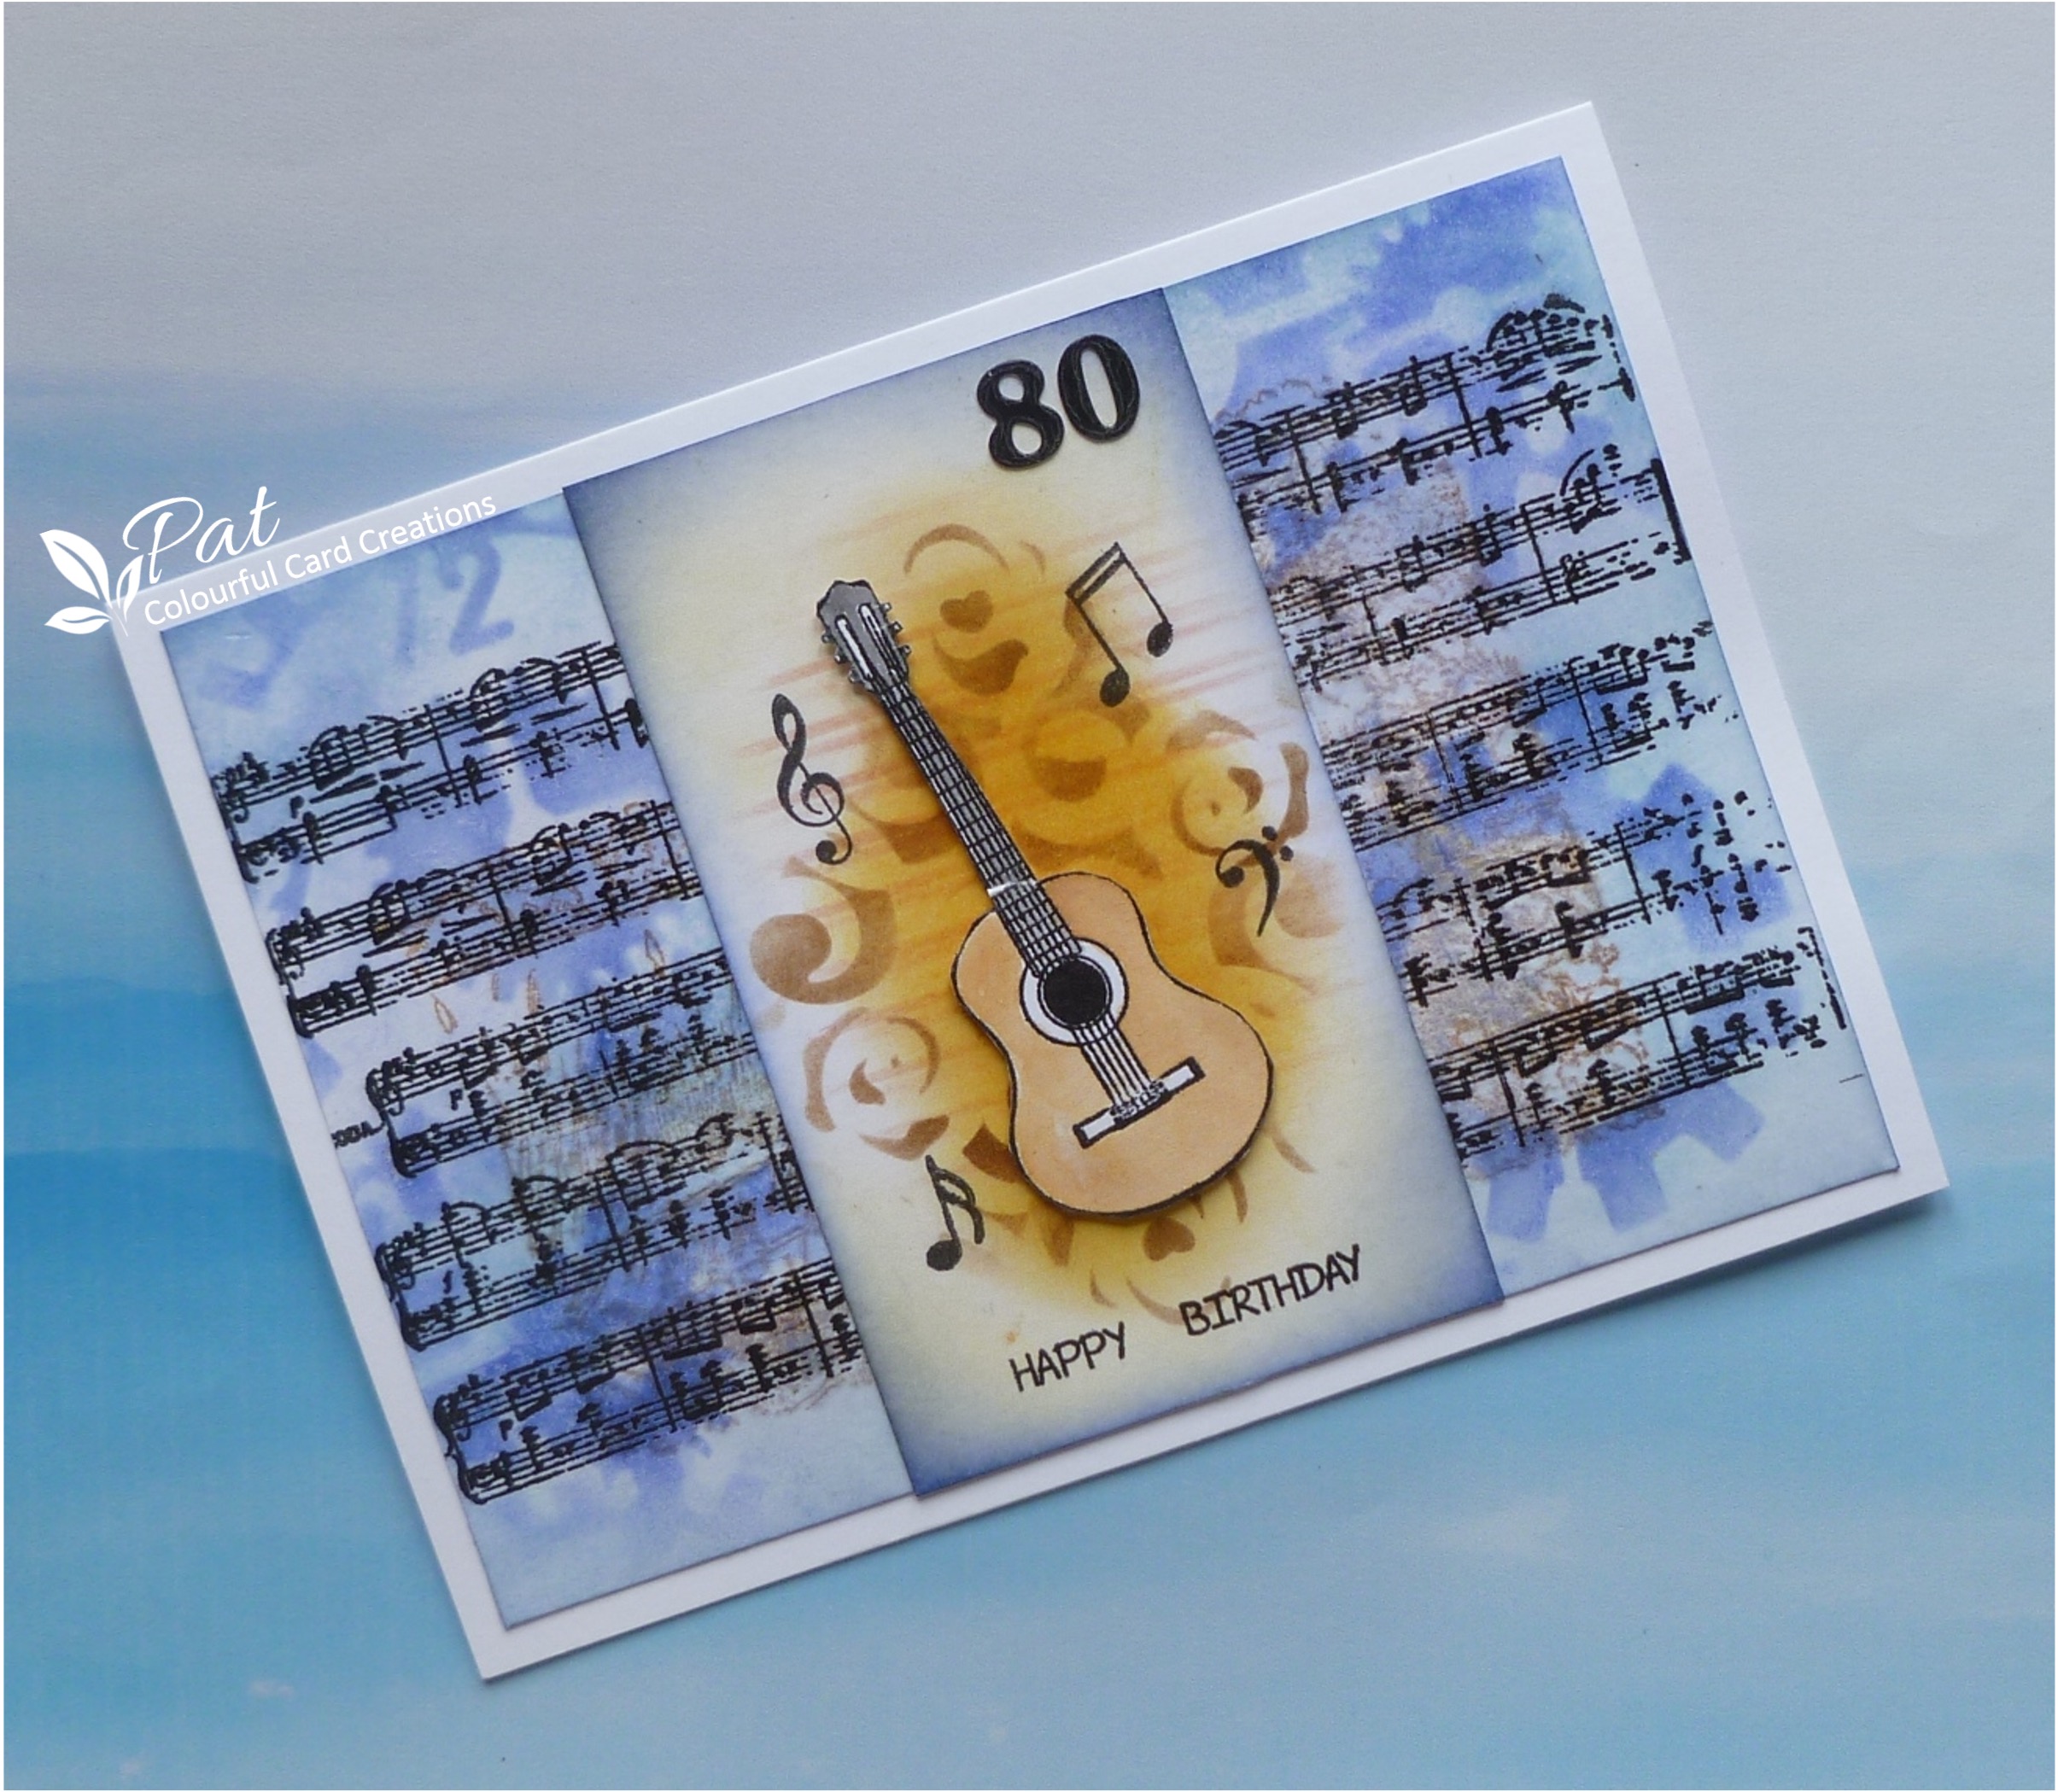
Hi there everyone.  I have an 80th birthday card today made for a lovely friend from hubby's choir and as he sings and plays the guitar I thought this would work well.  He had a celebration party which was lovely.  I used the acoustic guitar image from an old set of stamps from Creative Stamping Magazine from a few years back, and I added a clock face and cogs stencil in the background as he was an engineer who sorted the overhead wires out so as the song says he was 'a lineman for the county' here in Somerset, and I did use a countryside scene too, but that doesn't really show through.  Sadly there is a white mark on the guitar which I only noticed after I had taken the photos (I need new glasses..lol).  I think the card backing the neck of the guitar was a little short of the body and it developed a crease which I didn't notice and I did fix it with a bit of pencil before we went to the party but didn't have time to retake the photos.

I started with a piece of white card to fit a 7" x 5" card and added the countryside scene from a very old set of stamp by Sheena Douglass using Vintage Photo Distress Ink and I thought it was too prominent as I wanted to add other things over the top so  I spritzed it with water and dulled it down.  I then added an Artistic Stamper Music Background stamp using Versafine Clair Nocturne Ink and heat embossed with WOW Clear Gloss Embossing Powder and blended some Adirondack Stonewashed  Ink over the top, and then added the cogs from a set of stencils bought at The Range quite a while ago using BluePrint Sketch DI. To be honest other than to add a bit of brown in the background the scene was more or less totally obliterated but the overall look was pleasing to the eye.  I did finish the background layer with some more BluePrint Sketch using the pad to ink along the edges.

I next stamped the guitar with the Nocturne ink onto a snippet of white card and heat embossed with the Clear EP and watercoloured with some Distress Inks and a waterbrush using Black Soot, Brushed Corduroy and Vintage Photo, and then fussy cut it out.  

I found another snippet for a panel to go down the middle of the card and used another stencil from the sets I bought at The Range using a blending tool and Ground Coffee DI and added some blended Fossilized Amber DI over the central area and more softly over the rest of the strip, and finally some music signs and notes stamped around the edges again using the Nocturne ink and heat embossed with the Clear Gloss EP, before backing the guitar with a double layer of pieces of card to give it dimension, and then added it over the top (I don't usually do this but my silicone glue would not come out of the tube..drat!)  To finish I cut the strip to size and darkened the edges with Blueprint Sketch DI before mounting the background and the strip on to the card.  I also die cut the numbers from a piece of card which I  first covered in Black Soot DI straight from the pad and heat embossed with the Clear EP.

Thank you for dropping by today and I hope to see you again soon.


I am entering the following challenges:

Snippets Playground Challenge - No. 431 Where we use our snippets of card, paper etc.
Happy Little Stampers June Watercolour Challenge - Anything Goes.
Happy Little Stampers June Stencil Challenge - Anything Goes.


Friday, 24 June 2022

CAS Mix Up Challenge

Hi there.  I am as usual quite late with my card for the CAS Mix Up Challenge which this time is Stencils with Pastes/Gels...really lovely to see it back after several months absence.  I don't use this technique very often and I had to search a bit to actually find something to use.  I found some Cosmic Shimmer Multi-Tex which is a bit like polyfilla and you mix it with water.  I added some colour with Pixie Powders in a blue and green to make a sort of turquoise colour, and I have a new die which I used for the card on my last post here which I used as a stencil.  I also used a set of stamps by Creative Expressions called Waterlily.

I started with a piece of card just a little smaller than my 6"square card and placed the die cut stencil, which I cut from card, centrally, and using an old plastic store card I created the texture paste background.  I am not very skilled at this technique and some of it went underneath the stencil and wasn't very tidy, so I decided to cut that down and then add a die cut piece of card using the same die to go over the top, and I left a bit of extra space round the edge to make it easier to get it to fit properly on the card, and before doing this I used a bit of Glossy Accents over the paste to give it a bit of a shine applied using a piece of kitchen towel dabbing it on, and in real life it is quite shiny.

I then stamped the flowers and dragonfly on to a piece of white card using Versafine Clair Nocturne Ink and heat embossed with WOW Clear Gloss Embossing Powder and coloured with Distress Inks and a waterbrush using Scattered Straw and Fossilized Amber for the flowers, and with just a little bit of Abandoned Coral to stengthen the colour in the centre of the flower, and then for the leaf I used Twisted Citron and Lucky Clover.  I coloured the dragonfly with a bit of Peacock Feathers for the body to match the tone of the background, but it looks more blue than turquoise in the photo, and Adirondack Sunshine Yellow on the wings with some added Wink of Stellar for a little sparkle.   I think maybe the black embossed outlines are a bit heavy for the dragonfly but I wanted it to match the waterlily flowers and leaves.

I finished with a sentiment from the same set stamped with the Nocturne Ink and heat embossed with the Clear EP.  

Before I go I would like to introduce and also thank Marja for becoming a follower, whose blog you will find here, and I'm sure she would love you to go and visit her.  Thank you for dropping by today and I hope to see you again soon.


I am also entering the following challenges:

We Love Stamping Challenge - June - Anything Stamped with the Option of Roses.
The Flower Challenge - No. 69 Colour Blue and Yellow.
AAA Birthday Challenge - No. 38 Flowers.